Skip to content

Add a Network Printer

The following instruction may be followed when you know the IP address of the network printer. Often times the printer’s IP address will be displayed on the printer’s screen or be labeled on the printer. We can certainly install a printer for you – please contact us.

    1. Click Start (or press the Windows Key + R on your keyboard and skip to step 3)
    2. Type “run” and press enter
    3. Type “control printers” and press enter
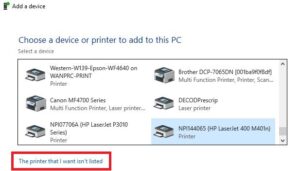
    4. Click Add a printer near the top of the window

Printer Add Device

    1. Click The printer that I want isn’t listed at the bottom of the window

Printer Not Listed

    1. Select Add a printer using TCP/IP address or hostname
    2. Click Next
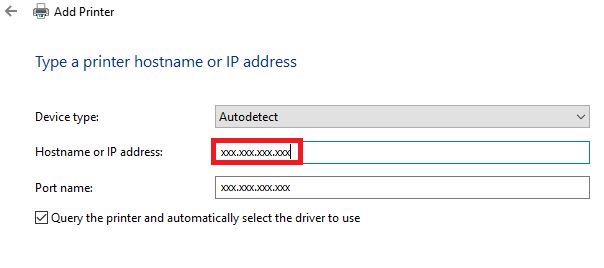
    3. Fill in the Hostname or IP address field with the printer’s IP address, which will automatically fill in the Port name field as well
    4. Ensure the box is checked next to Query the printer and automatically select the driver to use

Printer IP Address

  1. Click Next
  2. You may be presented with one of two windows:
    – If a window pops up asking Which version of the driver do you want to use? select Replace the current driver
    – If a window pops us asking you to select a driver, try to locate the appropriate selection based on the make and model of the printer – please contact us for assistance if you are unable to find the appropriate selection or are unsure which to choose
  3. Click Next
  4. For the Printer name, input a name relevant to the location and the printer type, for example, HSB-170 Ricoh, or B170 HP Laserjet
  5. Click Next
  6. Select Do not share this printer
  7. Click Next
  8. Click Print a test page to verify the printer is working (unless you are using a Ricoh with a job code, in which case click Finish and follow these instructions: Storing a Job Code for a Printer)
  9. Click Finish
  10. Your printer will now appear in the Devices and Printers screen you began at – if you’d like the newly-installed printer to be your default printer, right-click and click Set as default printer.

Add or Remove Employees from UW Groups

Access to network shared drives and some other resources is controlled by UW Groups. Membership in a group can open up access to certain folders on network shares. ASA-IS can help you identify which groups you are the owner of, which groups control access to what resource, and help you manage membership of those groups. Here is a quick guide on how to add and remove employees from a group.

    1. Go to Groups Service Management
    2. If prompted, login with your NetID credentials
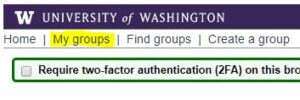
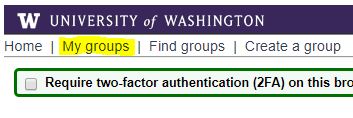
    3. Click My Groups in the upper left-hand corner of the page

My Groups

    1. Find the group you wish to add/remove users from and click on the purple link below the bold name
      Note: AN ASA-IS technician can help you identify the correct group if you are unsure about which one to choose
    2. Click on Membership
      Tip: If this is a group you administer frequently, you can bookmark this page directly instead of going through steps 1-4.

Groups Membership

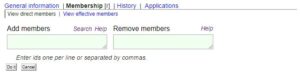
  1. Type in the NetID of the user(s) you wish to add or remove in their respective boxes
  2. You can enter multiple NetIDs at a time by writing each NetID as a separate line in the Add Members or Remove Members box
    Tip: You can add and remove users at the same time (such as removing a former employee and adding their replacement)
  3. After you’ve entered all the NetIDs, click the Do It button
  4. Once the operation completes, you can close your browser
  5. The people you added to the groups may need to log out of their computer and log back in

Manage UWNetIDs


  • Change Password for a Shared NetID/UW Email

    A Shared UW NetID is an account intended to be used by multiple people to access a shared resource such as a UW email. Access is most often given simply by giving an employee the username and password to the account. Once they have that, they can Add a Shared NetID Account to Outlook. When someone…

    Read more


  • Shared NetIDs

    Shared NetID accounts must be requested using UW-IT's request form. Before requesting a shared NetID, please read and be familiar with UW IT's Shared UW NetIDs information.

    Read more


  • Change Exchange/Email Display Name

    The following instructions help update the display name for a personal or shared UWNetID. Display names are visible, for instance, when someone receives an email from you or looks you up in the address book. Changes to UWNetID may take an overnight update to take effect. Individual NetID Go to Identity.UW services website. In the Profile Information…

    Read more


  • Change UW Email Forwarding

    If you are not receiving email to your Outlook account (especially for new employees), you may have your email forwarding set to a personal email or UW G Suite. We recommend UW employees forward their UW email to Office 365. If you are leaving the UW you can forward your email to another email in…

    Read more


  • Add Shared NetID Account to Outlook on Macs

    A Shared NetID account allows you to add additional email accounts without having to enter a password as long as your NetID has been added to the access group. Please contact your IT administrator for additional information. Follow the steps below once you have confirmed that your NetID has been added to the SendAs group…

    Read more

Printer Support


  • Store a Job Code for a Printer

    Save time by saving the Job Code in your printer preferences. Click Start - or press the Windows Key + R on your keyboard and skip to Step 3. Type "run" and press enter Type "control printers" and press enter Right click the printer you would like to store the code for Click Printing Preferences Click Detailed…

    Read more


  • Add a Network Printer

    The following instruction may be followed when you know the IP address of the network printer. Often times the printer's IP address will be displayed on the printer's screen or be labeled on the printer. We can certainly install a printer for you - please contact us. Click Start (or press the Windows Key + R on…

    Read more

Apple & Mac Support


  • MacOS: Remotely Connect to Your Windows Computer

    Download and install Microsoft Remote Desktop 10 from the App Store Once installed, follow these steps to add your workstation computer from your office: Launch Microsoft Remote Desktop 10. Click the "+" symbol located at the top of the window. [ Screenshot ] Click Add PC. Enter your work computer's name or IP address. If…

    Read more


  • Add Shared NetID Account to Outlook on Macs

    A Shared NetID account allows you to add additional email accounts without having to enter a password as long as your NetID has been added to the access group. Please contact your IT administrator for additional information. Follow the steps below once you have confirmed that your NetID has been added to the SendAs group…

    Read more

Computer Has No Sound

  1. Click on the sound icon in the system tray in the lower right-hand corner of your screen
  2. Sound Icon Taskbar

  3. Click on the slider bar to adjust volume
  4. If that does not work, try restarting your computer and if still not working, continue on
  5. Right click on the sound icon
  6. Click Sounds
  7. Click on the Playback tab
  8. Sound Playback

  9. Right click in the white space and ensure Show Disabled Devices is checked
  10. Right click on the speakers you would like to use (which may have been disabled) – if you do not know which to use, try a different speaker than the one with the green check mark
  11. If the device was disabled, click Enable Device first then right click on it again
  12. Click Set as default device
  13. Click OK to close the Sound window
  14. Try adjusting the volume as in step #1 – if you hear a dinging noise, the speakers are working properly.

Shared Email Not Updating/Disconnected

In the event a shared email account is no longer receiving new emails, remove and re-add the account to Outlook to resolve the issue.

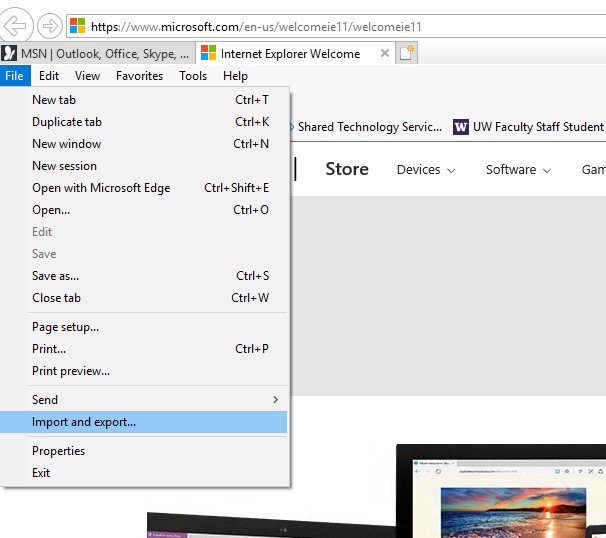
  1. From within Outlook, click on File in the main menu
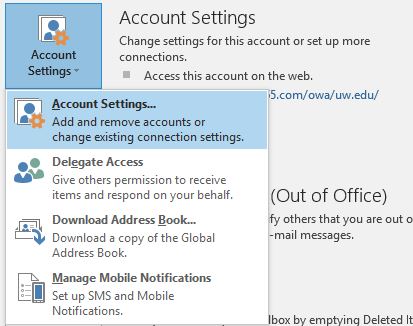
  2. Click on Account Settings, then Account Settings again [ Screenshot ]
  3. Select the shared email address and click Remove
  4. Click Yes if prompted whether you want to continue
  5. Once the account has been removed, click New [ Screenshot ]
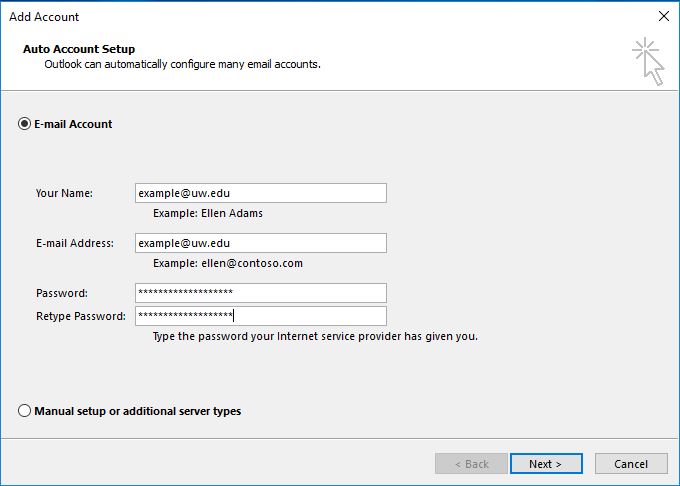
  6. In the Name field, put the Shared NetID
  7. In the Email field, put in the shared email address
  8. Type in the password and retype the password [ Screenshot ]
  9. Click Next
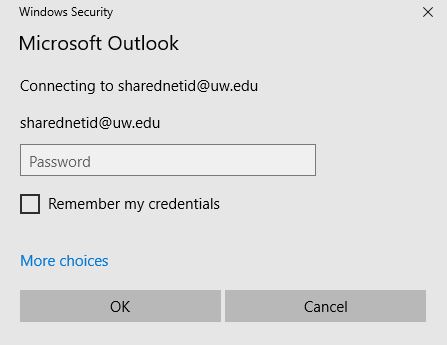
  10. If a Windows Security window pops up, type in the Shared NetID’s password [ Screenshot ]
  11. Click OK
  12. A UW NetID login page will appear, put in the Shared NetID and password
  13. Click Sign In [ Screenshot ]
  14. Your email will be added but you must restart Outlook for it to begin downloading the account’s emails

Export & Import Bookmarks on Internet Explorer

Export Bookmarks from IE

  1. Open Internet Explorer.
  2. If the menu bar isn’t visible, press the Alt key and the menu bar (with File, Edit, View, etc.) will appear.
  3. Click on the File menu and select Import and Export… The Import/Export Settings window will appear.
  4. Bookmark Import & Export on IE

  5. In the Import/Export Settings window, click Export to a file. Click Next.
  6. Select Favorites. Optionally you may click Cookies to export saved information of your bookmarks – choose the same save location as your bookmarks. Click Next.
  7. Click the topmost folder labeled Favorites. This will export all bookmarks below the tree. Click Next.
  8. Make note of the file path of where the file will be exported to. Alternately you may copy & paste the file path or click Browse to choose a location. Click Export.

Import Bookmarks to IE

  1. Open Internet Explorer.
  2. If the menu bar isn’t visible, press the Alt key and the menu bar (with File, Edit, View, etc.) will appear.
  3. Click on the File menu and select Import and Export…. The Import/Export Settings window will appear.
  4. Click Import from a file. Click Next.
  5. Select items to import, If you don’t not remember, choose Click Next.
  6. Locate the bookmark data file. Click Next. (You will also be prompted to locate a text file of your feeds and/or cookies.)
  7. You may choose to save the destination at the top most location, Favorites. This may create duplicates but can be easily removed by right-clicking on the duplicate and select delete. Click Import.
  8. Click Finish.

OneDrive: Sign-in and Setup

OneDrive Desktop Application

  1. Click the OneDrive icon (the gray cloud) in your system tray next to the time and and date. If it is not visible, click the ^ to reveal more icons. [ Screenshot ]
  2. Click Sign in [ Screenshot ]
  3. On the Set up OneDrive screen, enter your UW email address (netid@uw.edu) and click Sign in [ Screenshot ]
  4. When the UW NetID login page comes up, enter your NetID and password and click Sign in
  5. A OneDrive window will come up that explains where your OneDrive folder is located on the computer – if you’d like to, you can click Change location to set the location to somewhere else
  6. Click Next
  7. A set of brief tutorial slides will appear, click the arrow to continue through these slides
  8. At the end, click Open my OneDrive folder
  9. To go back to your OneDrive folder, click the yellow folder icon at the bottom of your screen and OneDrive-UW will be on the left-hand pane of that window [ Screenshot ]

OneDrive On the Web

  1. Go to OneDrive
  2. Enter your UW email address
  3. Press Enter or click Next
  4. Log in with your NetID credentials

ASA-IS OneDrive Resources

OneDrive: Overview

OneDrive for Business is a service provided to the University through UW IT. The IT Connect website has information regarding the UW’s implementation of OneDrive for Business.

ASA-IS provides OneDrive Resources as guides to setting up OneDrive and using its various functions, including sharing and collaborating on documents.

Eligibility

When Users Leave the UW

  • Current student, faculty, or staff accounts are disabled and the files are automatically deleted.
  • Faculty and staff accounts are disabled after 14 days.
  • Student accounts are disabled after one academic quarter.
  • Emeritus faculty accounts remain enabled.

Store and Share Files

  • Store up to 5TB of data in the cloud
  • 250GB maximum file size
  • Store HIPAA and FERPA protected data
  • Share files with UW users with a UW NetID

External Sharing Disabled

For more information about external sharing and options that will allow you to share with external users, refer to External sharing options.

ASA-IS OneDrive Resources