Working at the University of Washington has its perks and one of them is being able to install Office365. This allows you to install the application onto your personal computer and have access to all Office apps such as Word, Excel, PowerPoint, and OneDrive which includes 1TB of cloud storage.
Alternatively, Office365 is available for online use via a web browser. Log in with your UWNetID credentials to the Outlook on the Web (OWA). Click on the App Launcher icon (9-point grid) in the main menu to view the Office Apps available on the web.
Online Security
Anyone who uses OWA on a public computer must be sure to sign out completely from the OWA site, close the browser, and sign out of the computer, to secure your account.
Anyone who uses OWA on a public computer must be sure to sign out completely from the OWA site, close the browser, and sign out of the computer, to secure your account.
How to install Office365
To install Office365 please follow these steps:
- Navigate to Outlook on the Web (OWA)
- At the top left of the page, click Located at top left of page, then click Office 365 ->on the right
- On the new page there is a link labeled, Install Office ˅ -click and a drop down appears
- Click Office 365 apps
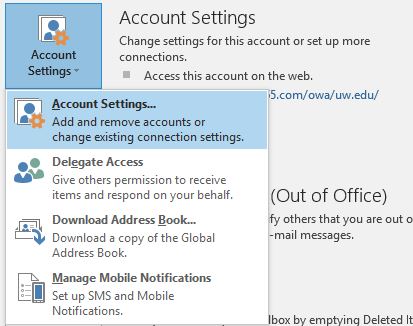
- Clicking Other install options will display your account settings
- For now, click Office 365 apps to begin
- The download will commence and a window will open showing you the location of where it will be downloaded
- Click OK
- Depending on your browser, you may see the completed download at the bottom of the browser
- Once downloaded, proceed to click the download to execute the install or go to the location of the download
- The install is automatic and will finish shortly


