To access ADAI resources from offsite or from another domain, such as the NetID domain, you will need to configure and connect to the ADAI VPN. The following instructions to establish a VPN connection are provided for both Windows and Mac.
Review the resources to Access your Computer or Connect to a Shared Drive that can be accomplished once you are connected to the ADAI VPN.
Computers Running Windows 10
- Click on the Start button
- Type “VPN”
- Click Change Virtual Private Networks (VPN)
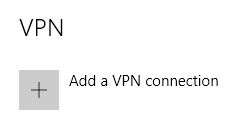
- Click the “+” symbol next to Add a VPN Connection

- Enter the following information:VPN Provider: Windows (Built-in)
- Connection Name: ADAI
- Server name or address: remote.adai.washington.edu
- VPN Type: Automatic
- Type of sign-in info: Username and Password
- User name: ADAI\youradaiusername
- Password: Leave blank
- Scroll down and click Save
- Back on the VPN screen click on ADAI
- Click Connect

- If it does not auto-fill, put your username as ADAI\youradaiusername
- Enter your password
- Click OK
- It will show as Connected when it is ready
- When you are done, click Disconnect
Apple/Macintosh Computers
To access the ADAI VPN on a Mac you will need to first contact CSS at 206-543-9413 or csshelp@uw.edu to be given the Shared Secret, a verification method that is part of this setup.
- Click on the Apple button
- Click System Preferences
- Open Network
- Click the “+” symbol to create a new VPN connection
- In the Interface popup, configure as follows:
Interface = VPN
VPN Type = L2TP over IPSec
Service name = ADAI - Click Create
- On the next screen, click the drop-down next to Configuration
- Select Add configuration
- Type in “ADAI”
- Click Create
- Input the following information:
Server Address = remote.adai.washington.edu
Account name = adai\adaiusername - Click the Authentication button and select:
User Authentication = leave blank
Shared Secret = [contact CSS at 206-543-9413 or csshelp@uw.edu] - Click OK
- Click Apply
- Click Connect