Skip to content

Work from Home Guides

Employee and Department needs and authorization may vary. Not all guides shown below may be relevant for your work-from-home setup.

UW VPN Setup

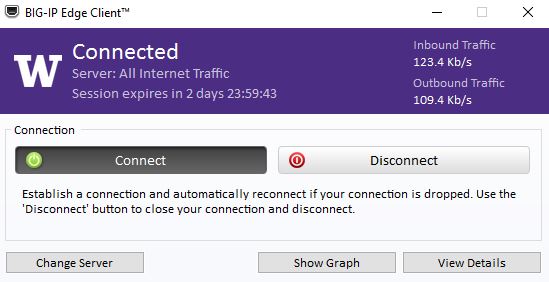
The first and most important step to working from your home computer is to download and install Husky OnNet (aka BIG-IP Edge Client).  This software creates a secure connection to the UW servers which many applications, intranet sites, and department shared drives require:

UW IT Connect: Download Husky OnNet VPN

Once you have navigated to IT Connect: Download and use Husky OnNet:

  • click on the link for: Download Husky OnNet
  • click: Terms and Conditions
  • click: I Agree

Important: Some departments require specialized VPN configurations in addition to installing the VPN client. If you belong to one of the following departments, please click the appropriate link for instructions or contact info to complete these additional steps:

Hall Health Center (HHC)

Please email Hall Health IT at hhnhelp@uw.edu


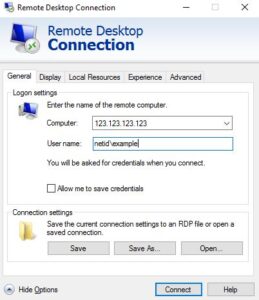
WFH Option 1 – Connect directly to your office computer

You can use your home computer to set up a remote connection to your office computer. This may be the easiest option for most employees since it only takes a few steps and does not require additional software since you will still be working off of your regular office PC.

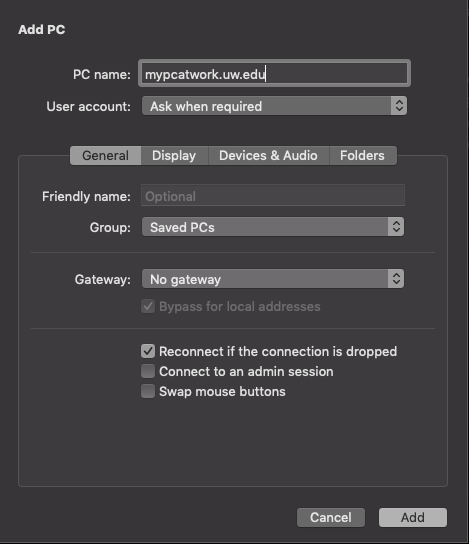
Step 1: Before you can establish a remote connection to your work PC, you will either need the name of your PC or your IP address:

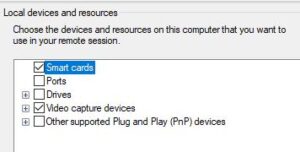
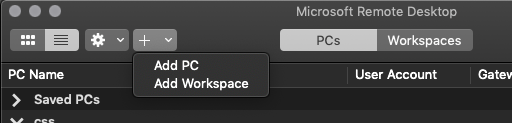
Step 2: From your home computer after connecting to the VPN you the remote connection software to start a remote session with your office computer:

Note: It is important that you do not put your office computer to Sleep or Shut Down as this will make it inaccessible until someone physically goes to the computer to turn it back on.

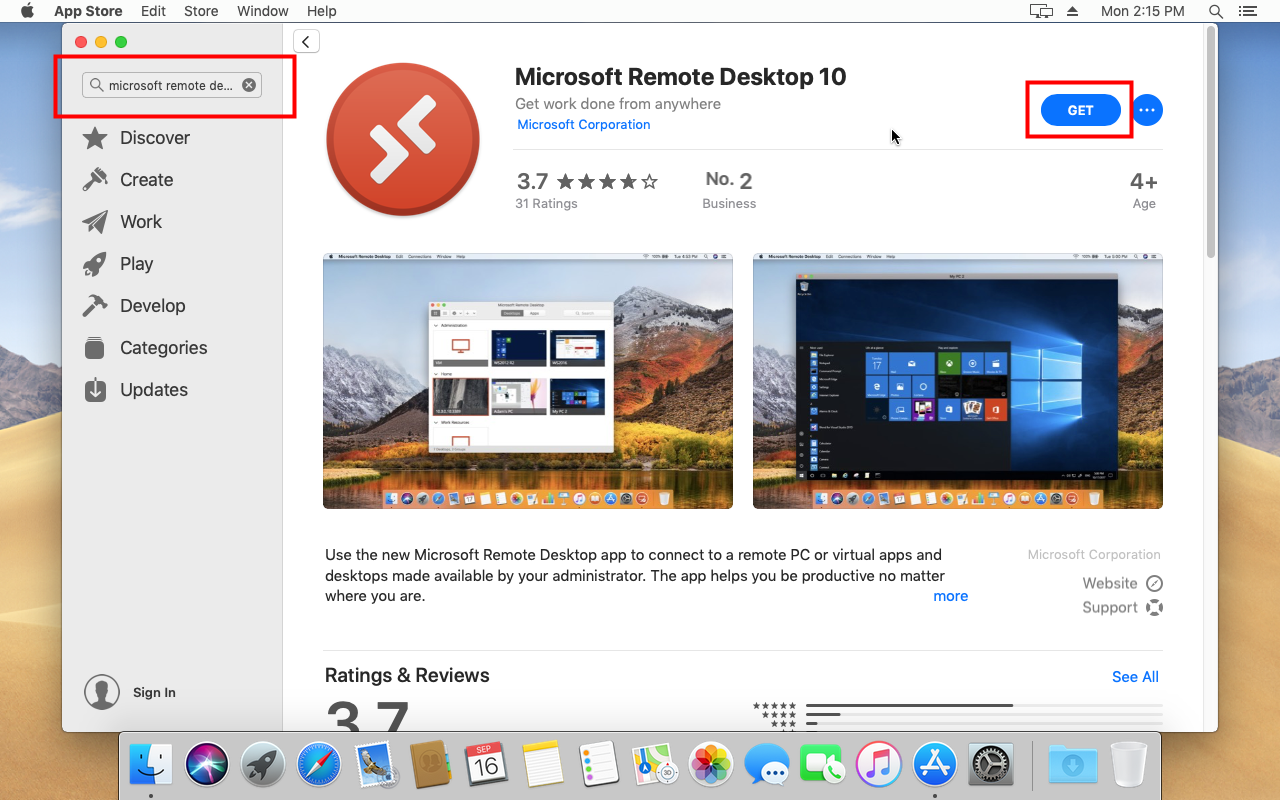
WFH Option 2 – Configuring your home computer for work

Guides for installation and configuration of frequently used software and network resources you may need when working directly off of your home computer.

Accessing your UW Email

You can connect to your UW Email either through a web browser using the Outlook Web Application (OWA) or you can use you NetID to download and install a fully licensed copy of Microsoft Office 360 Pro Plus.

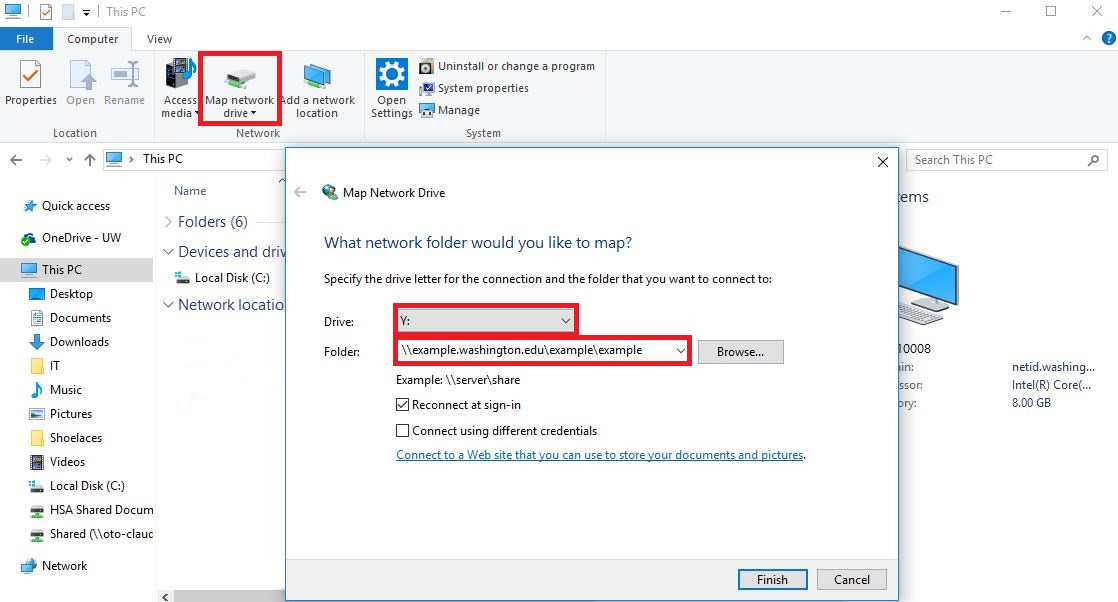
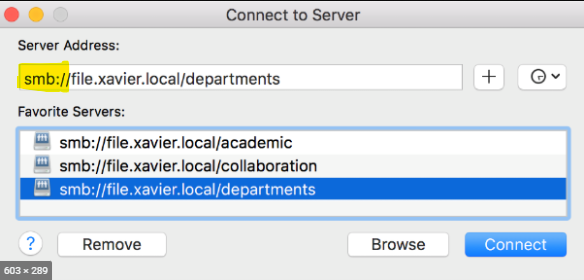
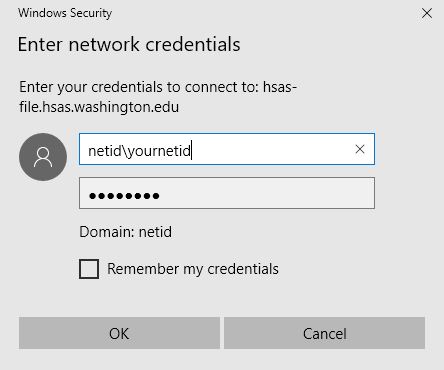
Adding your Department Drives

While the VPN is connected, you will be able to connect to your department’s drives. Follow these directions to get your mapped drives setup:

Installing Zoom

You may need to install Zoom in order to attend UW meetings or for receiving help from ASA-IS. The University of Washington has a license for Zoom that will allow you to install an upgraded version of the program for free:

Zoom for HIPAA and FERPA Related Tasks

If your meetings will contain content that falls under HIPAA or FERPA guidelines, it would be best to use the special version of Zoom that fulfills the state requirements for those subjects. You can find that information here:


Additional Resources

Connect to Husky OnNet

Husky OnNet is a VPN service used to connect to UW resources from off of the UW network. If you are trying to remote into your work computer or access network folders, please install Husky OnNet and then review these articles:

Check for Husky OnNet on UW devices

If you are on a UW device, you should have Husky OnNet installed. To check if you do:

  1. Click the Windows Start button
  2. Search for “Big”
  3. If you get the result “BIG-IP Edge Client,” you already have the client installed. Go to Step 3 of the directions to Connect Using Husky OnNet.
  4. If you do not have BIG-IP Edge Client installed, follow the instructions to Download Husky OnNet.

Remote Access Big-IP

Download & Install Husky OnNet

  1. Go to Husky OnNet Terms & Conditions
  2. Review the terms and conditions and click “I agree
  3. Click on the corresponding client for your operating system (Macintosh or Windows) to download it
  4. Open and run the installation.

Connect Using Husky OnNet

  1. Click the Windows Start button
  2. Search for “Big”
  3. Click “BIG-IP Edge Client” to open Husky OnNet
  4. For future use you can right-click the icon on the taskbar at the bottom of the screen and select “Pin to taskbar” so you can use that
  5. Click the “Connect” button
  6. Remote Access Big-IP Connected

  7. Log in using your UWNetID credentials
  8. Once it says “Connected” you are ready to connect to UW resources.

Connect to ADAI VPN

To access ADAI resources from offsite or from another domain, such as the NetID domain, you will need to configure and connect to the ADAI VPN. The following instructions to establish a VPN connection are provided for both Windows and Mac.

Review the resources to Access your Computer or Connect to a Shared Drive that can be accomplished once you are connected to the ADAI VPN.

Computers Running Windows 10

  1. Click on the Start button
  2. Type “VPN”
  3. Click Change Virtual Private Networks (VPN)
  4. Click the “+” symbol next to Add a VPN Connection
  5. Remote Access Add VPN

  6. Enter the following information:VPN Provider: Windows (Built-in)
    • Connection Name: ADAI
    • Server name or address: remote.adai.washington.edu
    • VPN Type: Automatic
    • Type of sign-in info: Username and Password
    • User name: ADAI\youradaiusername
    • Password: Leave blank
  7. Scroll down and click Save
  8. Back on the VPN screen click on ADAI
  9. Click Connect
  10. Remote Access Connect ADAI

  11. If it does not auto-fill, put your username as ADAI\youradaiusername
  12. Enter your password
  13. Click OK
  14. It will show as Connected when it is ready
  15. When you are done, click Disconnect

Apple/Macintosh Computers

To access the ADAI VPN on a Mac you will need to first contact CSS at 206-543-9413 or csshelp@uw.edu to be given the Shared Secret, a verification method that is part of this setup.

  1. Click on the Apple button
  2. Click  System Preferences
  3. Open Network
  4. Click the “+” symbol to create a new VPN connection
  5. In the Interface popup, configure as follows:
    Interface = VPN
    VPN Type = L2TP over IPSec
    Service name = ADAI
  6. Click Create
  7. On the next screen, click the drop-down next to Configuration
  8. Select Add configuration
  9. Type in “ADAI”
  10. Click Create
  11. Input the following information:
    Server Address = remote.adai.washington.edu
    Account name = adai\adaiusername
  12. Click the Authentication button and select:
    User Authentication = leave blank
    Shared Secret = [contact CSS at 206-543-9413 or csshelp@uw.edu]
  13. Click OK 
  14. Click Apply
  15. Click Connect

Find Computer Name, IP, MAC Address

Your computer’s Hostname and IP address are useful pieces of information to have. You may need them to remote into your computer and the ASA-IS team may need it to remote in when supporting you remotely.

Note: There may be a sticker on your device with your computer’s name (examples: OTO-12345, HSAS-12345, BIME-12345).

Networks.uw.edu – IP and MAC Address

The easiest way to find your IP address is in the Network Portal [requires UWNetID].

It’s a good idea to bookmark this site so you can come back to it easily.

You can also find your MAC address here which is useful for certain scenarios such as registering a device on the UW wireless manually if it can’t connect.

Command Prompt – IP address and Computer Name

  1. Click the Start button
  2. Type “cmd”
  3. Click the Command Prompt option that appear – a block box will come up with a blinking white cursor
  4. type in ipconfig and press enter
  5. Your IP address is on the IPV4 Address line, in the format xxx.xxx.xxx.xxx
  6. To get your computer name, type in hostname and press enter – the name will be given on the next line

Connect to a Network Shared Drive

Use these instructions to connect to your departmental network shared folders.
Note: If you are connecting from off the UW network or from a different UW domain, please first connect via the Husky OnNet

Windows 10

  1. Right-click the Start button located in the lower-left-hand corner of the screen
  2. Click on File Explorer
  3. In the navigation pane of File Explorer, click This PC
  4. Under the Computer tab, click Map Network Drive
  5. Choose a drive letter – this is a placeholder but if your department has standardized which letter to use (“Open the P drive,” for example – a list of folders is presented) then assign that letter
  6. Paste in or type the address of the network share you are trying to access
  7. If you are connecting from off the UW network or a different domain than the share you are connecting to, please jump to Connecting With UW Credentials
  8. Network Map Drive

  9. Click Finish.

Windows 7

Map a network drive to get to it from Computer or Windows Explorer without having to look for it or type its network address each time.

  1. Click the Start button
  2. Click Computer
  3. Click Map Network Drive in the toolbar at the top of the window
  4. Choose a drive letter – this is a placeholder but if your department has standardized which letter to use
    (“Open the P drive,” for example – a list of folders is presented) then assign that letter
  5. Paste in or type the address of the network share you are trying to access
  6. If you are connecting from off the UW network or a different domain than the share you are connecting to, please jump to Connecting With UW Credentials
  7. Click Finish

Mac

  1. If you are not on campus, connect to the VPN, Husky OnNet (BIG-IP Edge client)
  2. On the Mac keyboard, press the Command key + k. This will bring up Connect to Server window.
  3. Type in smb:// before the file path, – for example:
    smb://**enter_your_filepath_here**
  4. Connect Mac to Network Server

  5. Click the + button, located at the bottom left of the window. This will add it to the Favorites in the Connect to Server window.
  6. Click Connect and enter your UW NetID credentials, if prompted.

Permanently Mount the Drive After a Restart

  1. Open ‘System Preferences‘ from the Apple menu. It is located at the top left of the desktop, click the Apple icon.
  2. Click, ‘Users & Groups
  3. Click ‘Login Items‘ at the top-center of the ‘Users & Groups’ window.
  4. Click the ‘+‘ symbol, located directly at the bottom-center of the window.
  5. Click the shared drive that you just mounted.
  6. Now select the directory you want to mount permanently.
  7. Exit out of System Preferences.

Connect with UW Credentials

Use these instructions if you are connecting from off of the UW network or to a different UW domain.
Note: If you have added your drive previously but it shows as disconnected, check your connection to the VPN and then try opening the drive again.

Windows 7/10

  1. Make sure the box next to Connect using different credentials is checked
  2. Click Finish
  3. You will be prompted for your username and password – put in your username as
    netid\youruwnetid or the domain you are connecting to, for example, adai\adaiusername or wanprc\wanprcusername
  4. Input the corresponding password
  5. Click OK.
  6. Network Enter Credentials

Windows 10: Remotely Access Your Computer

Whether you’re at home or off the UW network, there are a number of resources available to remotely access your computer.

Network Connection Requirements

Initiate Husky OnNet

  1. Locate and launch the application BIG-IP Edge Client
    Windows: Click the Start button in the Windows taskbar, search for Big.
    Macs: Open the Applications folder through the finder.
  2. Click Big-IP Edge Client to open Husky OnNet.
  3. Click Connect, this will launch the VPN and secure a connection to the UW network.
  4. Log in with your UWNetID credentials
  5. A red circular f5 icon in the Windows taskbar indicates that you are securely connected.
  6. Continue with the next step.

Launch Microsoft Remote Desktop

Windows

  1. Click Start
  2. Type “remote”
  3. Click on Remote Desktop Connection

Create a Remote Desktop Connection

Remote Desktop Setup

  1. Click Show Options
  2. Enter the computer name or IP address
  3. Enter your username as netid\yournetid (or adai\, wanprc\ instead of netid if you are on those domains)
  4. Leave the box unchecked next to “Allow me to save credentials”
  5. You can also configure your remote connection to use all of your monitors, your local webcam, microphone, printer, etc. using the following instructions.

    Monitors

    • Click the Display tab
    • Check the box next to Use all my monitors for the remote session

    Microphone

    • Click on the Local Resources tab
    • Click Settings beneath Remote Audio
    • Select Record from this computer
    • Remote Access Audio Recording

    • Click OK

    Home Printer

    To be able to print to your local printer while remotely connected to your work computer, check the box next to Printers on the Local Resources tab

    Webcam

    • Click More at the bottom of the Local Resources tab
    • Check the box next to Video capture devices
    • Remote Access Video Capture

    • Click OK.
  6. When you are done selecting the devices you wish to use, click on the General tab again. Click Save to save the connection or Save As to create an icon specifically for this connection you can use in the future (on your desktop or wherever you like)
  7. Click Connect
  8. If it asks you if you trust the connection, click Yes
  9. Type in your password
  10. Click OK and you will be logged into your computer

Manually Install Windows Updates

If you are using a UW-owned mobile device supported by ASA-IS to work from home, please follow the instructions below to process Windows updates.

Connect to Husky On Net or ADAI VPN

Before you can connect to our servers to run the updates, you must first connect to Husky OnNet VPN or, if you are an ADAI employee, the ADAI VPN.

Running the Updates

  1. Click on the Windows Start button in your taskbar
  2. Click on the gear icon [ Screenshot ]
  3. Click on “Update and Security” [ Screenshot ]
  4. Click on the gray button “Check for updates
    Note: do not click on the “Check online for updates from Microsoft Update” button. Those updates are not vetted by ASA-IS yet and may cause issues with your system. [ Screenshot ]
  5. You will receive one of two messages – that your computer is up to date or provided a list of updates to download. You may have to click an “Install now” button to install the updates. [ Screenshot ]
  6. Once updates are installed, you may be prompted to restart your computer to finish installing updates. [ Screenshot ]

MacOS: Remotely Connect to Your Windows Computer

Download and install Microsoft Remote Desktop 10 from the App Store

Remote Desktop MS Store

Once installed, follow these steps to add your workstation computer from your office:

  1. Launch Microsoft Remote Desktop 10.
  2. Click the “+” symbol located at the top of the window. [ Screenshot ]
  3. Click Add PC.
  4. Enter your work computer’s name or IP address. If you do not know the PC name please contact us. Alternately, you may enter your computer’s IP address if known. [ Screenshot ]
  5. You may enter an optional name to identify your Windows 10 connection under Friendly name.
  6. Optional:
    • Click the Display tab. [ Screenshot ]
    • Click to add a check mark on Use all monitors.
    • Follow the next steps to complete your remote session.
  7. Click Devices & Audio tab. [ Screenshot ]
    • Place a checkmark on these items: Clipboard | Microphone | Cameras
    • Confirm that Play Sound setting is set to: On this computer
  8. Click Add.

Test your connection setup

  1. Double-click the remote session that you have created.
  2. Enter your username and password, for example:
    • Username: netid\ your_netid
    • Password: your_netid_password
    • Click Connect.
    • A warning message will appear stating if you want to trust the connection, click Continue.

If you are not able to connect or you receive an error message that you do not have permission or any other error messages, please confirm your configuration.

Outlook Web App

Outlook Web App (OWA) is an online interface you can use to access your UW email and calendar from anywhere. Your desktop Outlook and the Outlook Web App are synced, so you don’t have to worry about missing emails or transferring anything between the two. While it does not have all the functionality of the desktop application form of Outlook, it is a handy resource to use when you are remote or on the go.

  1. Go to Outlook OWA for UW
  2. Type in your @uw.edu email (example@uw.edu)
  3. Click Next
  4. A message appears: Taking you to your organization’s sign-on page
  5. A UW NetID login page will come up – sign in with your UW NetID and password
  6. After you sign in you will be redirected to the Outlook Web App