Use these instructions to connect to your departmental network shared folders.
Note: If you are connecting from off the UW network or from a different UW domain, please first connect via the Husky OnNet
Windows 10
- Right-click the Start button located in the lower-left-hand corner of the screen
- Click on File Explorer
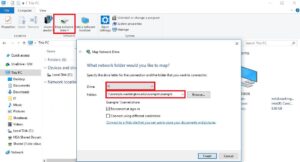
- In the navigation pane of File Explorer, click This PC
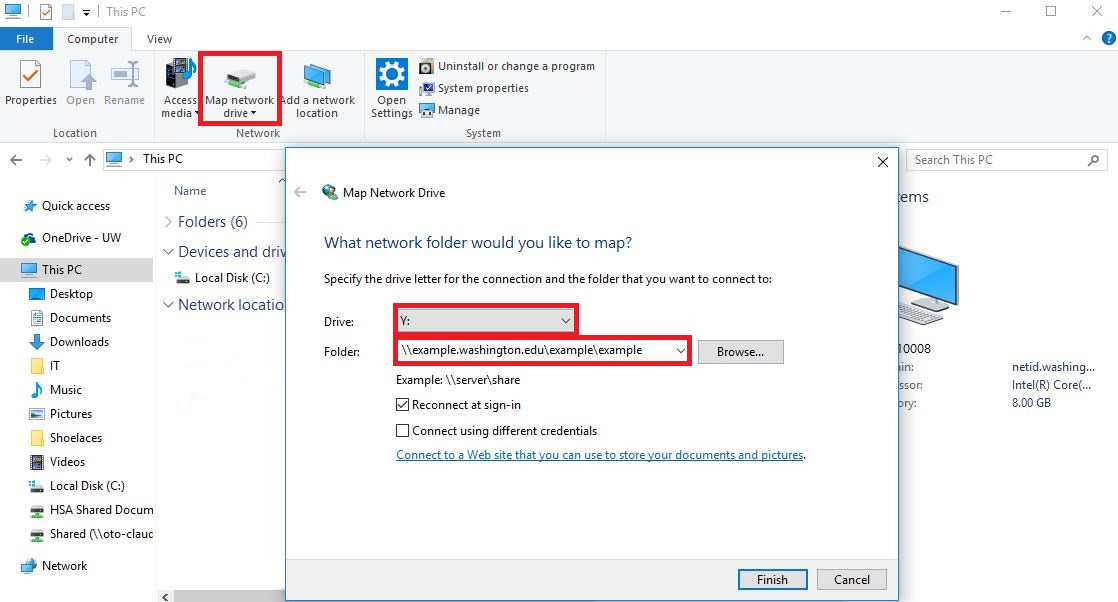
- Under the Computer tab, click Map Network Drive
- Choose a drive letter – this is a placeholder but if your department has standardized which letter to use (“Open the P drive,” for example – a list of folders is presented) then assign that letter
- Paste in or type the address of the network share you are trying to access
- If you are connecting from off the UW network or a different domain than the share you are connecting to, please jump to Connecting With UW Credentials
- Click Finish.
Windows 7
Map a network drive to get to it from Computer or Windows Explorer without having to look for it or type its network address each time.
- Click the Start button
- Click Computer
- Click Map Network Drive in the toolbar at the top of the window
- Choose a drive letter – this is a placeholder but if your department has standardized which letter to use
(“Open the P drive,” for example – a list of folders is presented) then assign that letter - Paste in or type the address of the network share you are trying to access
- If you are connecting from off the UW network or a different domain than the share you are connecting to, please jump to Connecting With UW Credentials
- Click Finish
Mac
- If you are not on campus, connect to the VPN, Husky OnNet (BIG-IP Edge client)
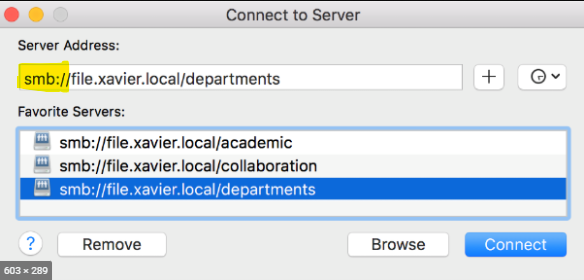
- On the Mac keyboard, press the Command key + k. This will bring up Connect to Server window.
- Type in smb:// before the file path, – for example:
smb://**enter_your_filepath_here**
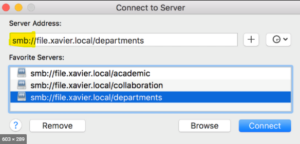
- Click the + button, located at the bottom left of the window. This will add it to the Favorites in the Connect to Server window.
- Click Connect and enter your UW NetID credentials, if prompted.
Permanently Mount the Drive After a Restart
- Open ‘System Preferences‘ from the Apple menu. It is located at the top left of the desktop, click the Apple icon.
- Click, ‘Users & Groups‘
- Click ‘Login Items‘ at the top-center of the ‘Users & Groups’ window.
- Click the ‘+‘ symbol, located directly at the bottom-center of the window.
- Click the shared drive that you just mounted.
- Now select the directory you want to mount permanently.
- Exit out of System Preferences.
Connect with UW Credentials
Use these instructions if you are connecting from off of the UW network or to a different UW domain.
Note: If you have added your drive previously but it shows as disconnected, check your connection to the VPN and then try opening the drive again.
Windows 7/10
- Make sure the box next to Connect using different credentials is checked
- Click Finish
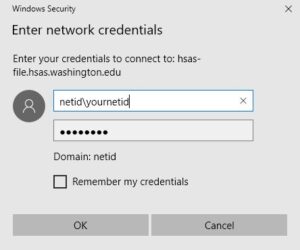
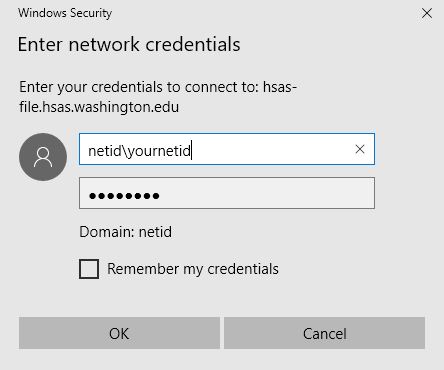
- You will be prompted for your username and password – put in your username as
netid\youruwnetid or the domain you are connecting to, for example, adai\adaiusername or wanprc\wanprcusername - Input the corresponding password
- Click OK.